Single sign-on(SAML) setup
SAML is a web standard that allows services, such as TunnelHound, to receive authentication and authorization data from an appropriate Identity Provider (IP).
SAML requires users to have a pre-existing IP. Examples of SAML 2 Identity Providers include:
TunnelHound allows appliances to use SAML to allow users to login. You will need a Medium Business or Enterprise license in order to see the SAML settings and configure single sign-on.
Setup instructions
In order to setup SAML, you’ll need an appropriate license. See our section on license management for information on how to acquire a license.
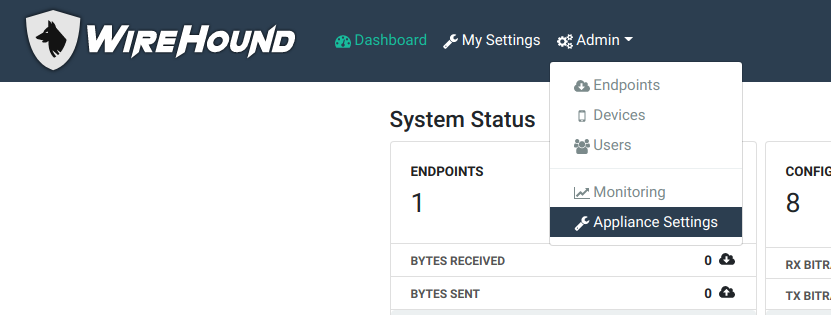
Once you’ve acquired the license, navigate to the appliance settings page.

When you have an appropriate license, you’ll see the following section:

Getting the Identity Provider metadata
Now, navigate to your SSO Identity Provider in a new tab, and follow their instructions for downloading the Identity Provider metadata. You can typically find this in the administration page. Here are some links to instructions for common IDPs.
- Google GSuite
- Shibboleth – The metadata is in your Shibboleth installation directory at
installation-dir/metadata/idp-metadata.xml. - miniOrange – Follow the section on starting without IDP metadata
- Okta – Follow the section on starting without IDP metadata
Once you have access to the IDP metadata XML file, download it and save it somewhere.
Uploading the metadata
Navigate back to the TunnelHound tab. Drag the XML file you downloaded above into the gray box in the SSO settings screen, or click on the gray box and select your XML metadata file.

If all goes well, there will be a new entry in the SSO list. It should contain an endpoint URI corresponding to the Identity Provider you added. For example, here is an example for a Google GSuite entry.

Configuring the Identity Provider
Your identity provider may require some options to complete setup. This usually takes the form of downloading SP metadata and uploading it to your SSO provider. You can download the SP metadata for your provider, by clicking the ‘Download SP metadata’ link next to the SSO entry. This will produce an SP metadata file that can be uploaded to your identity provider.
If you or your identity provider would prefer to configure manually, you can get the required options by clicking the Edit button next to the SSO entry.

And expanding the ‘Show SP Metadata’ section.

If prompted make sure to configure the identity provider to provide the e-mail address of the user as the identifier.
Once all looks good on both ends, click the ‘Enabled’ checkbox to enable the SSO login method.
At this point, users on the login page will be given the option to log in with a username and password or via the SSO provider by clicking the ‘Login with SSO’ button.

Multiple SSO providers
Some organizations may have multiple valid identity providers. You can add multiple providers by downloading their IDP metadata separately and uploading them one at a time using the process described above. Both will use This will create multiple entries in the SSO section.
Customizing the log-in button
If you have multiple SSO providers, you’ll likely want their buttions to look different and contain something other than ‘Login with SSO’. In order to customize the buttons corresponding to the SSO providers, click the Edit button next to the provider’s entry, as illustrated below.

You can now customize both the color and text of the button. Click complete when done. Each button will now appear differently on the login page, and users can choose how to log in.

Click complete when done and the button will be saved.
Starting with no IDP metadata
Some ID providers require you to upload SP metadata before giving you IDP metadata. You can work with these providers by clicking the ‘create without an IDP configuration’ link in the SSO provider zone. This will create a temporary SSO login method that will let you download the SP metadata via the ‘Download SP metadata’ link.
Once you have the Identity Provider set up, you can upload the IDP metadata by clicking the ‘Upload IDP Metadata’ link.
