User Administration
Users are the individuals that use your VPN via one or more devices connected to endpoints. Users can manage their device credentials, and – depending on the configuration – create their own devices. Users access the system by logging in with a password or using an SSO provider. Users are identified with an e-mail address.
Permissions Model
Every user is either a super user or a normal user. Super users are distinguished in three ways:
- They automatically have every permission
- They can access the special administration pages and create and modify all entities
- They can always log in with a username and password, even if username and password logins are turned off for normal users
Normal users can only change their contact information and the devices they own (and even then only in certain ways). They are granted permissions following a finer-grained permissions model. Currently, two permissions are defined:
- Can create devices – Any user with this permission has the ability to create more devices connected to any endpoint
- Can set custom IP – Any user with this permission can manually assign a static IP to their devices on any endpoint
Currently, per-endpoint permissioning is not available. Please contact TunnelHound support if you’re interested in this feature.
Managing Users
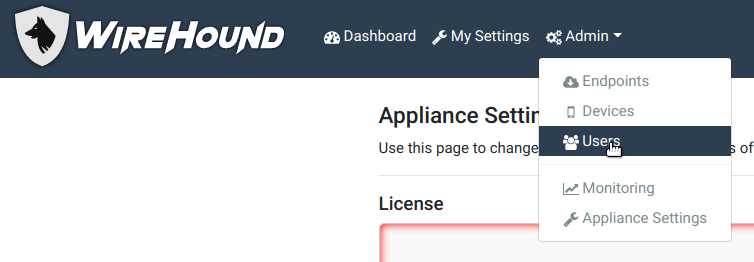
Users are managed in the administration interface, which is accessible only to super users via the Admin item in the navigation bar.
On the users page, you’ll see a table of all users. From here you can search users by using the search bar, edit existing devices, or add new ones.
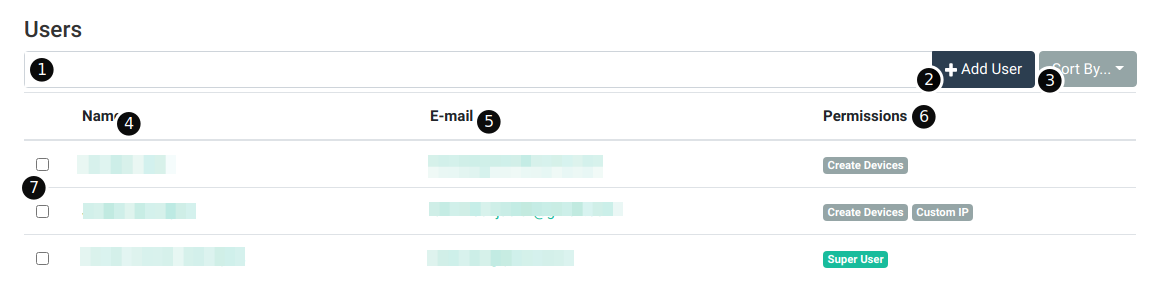
Here are the main components of the page:
- User search bar – You can search users by typing in a keyword here. You can also search by field by choosing the appropriate options in the search dropdown. For more information on search dropdowns, see the search page.
- Add user button – Click this button to add a user. See the section on adding users below.
- User sort button – Use this dropdown to determine how search results are sorted.
- Name column – This column contains the name of the user. Names are not unique.
- Email column – This column contains the user’s e-mail address. E-mail addresses are unique and can be used to identify a user.
- Permissions column – This column contains the permissions assigned to the user (or the special
Super Uservalue for super users).
Adding Users
To add a user, click the Add User button (item 2 in the diagram above). This will open the Add User modal.
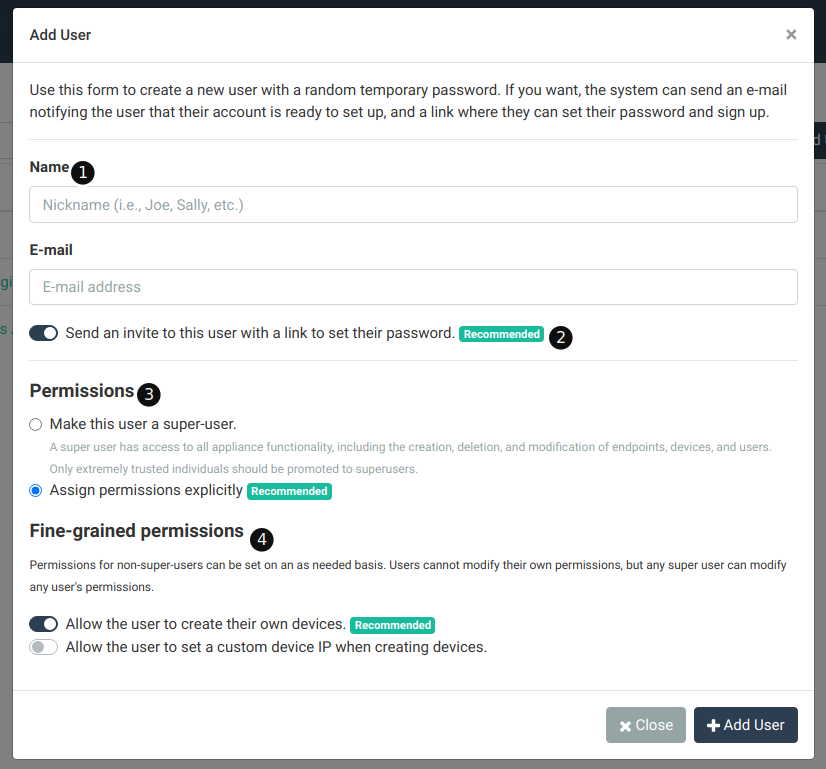
The items in this popup are described below:
- Basic details – Set the user name and e-mail here. The e-mail must be unique.
- Send Invite – If set, an e-mail is sent to the user with a link for them to set their password. Otherwise, users will have to follow the ‘forgot password’ link or log in with SSO in order to gain access.
- Permissions – Here you can choose whether or not the new user will be a super user or a regular user. If a regular user, then the fine-grained permissions section will appear.
- Fine-grained permissions – For normal users, you can set fine-grained permissions here. See the corresponding section above for more information.
Editing Users
To edit an existing user, click on either the name or the e-mail address in the user listing. This will bring you to the user detail page.
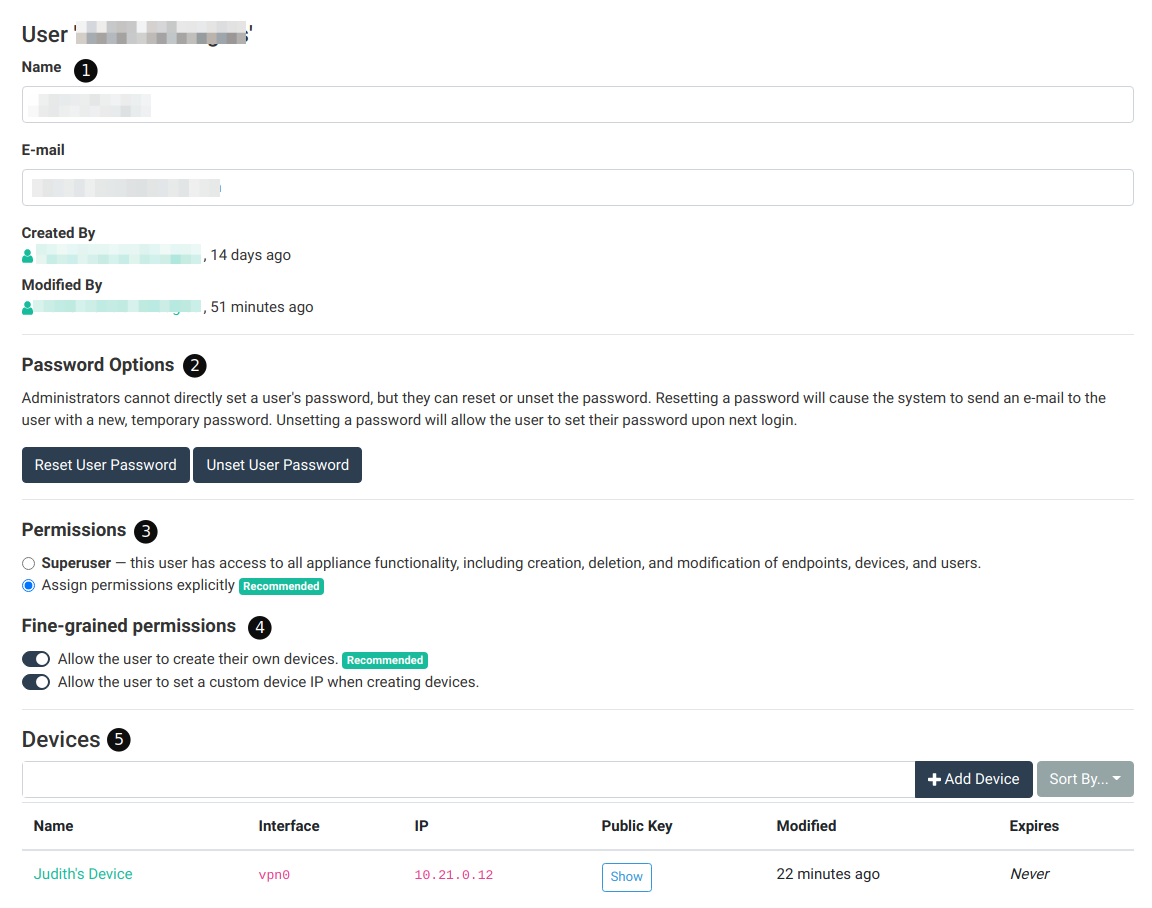
From here, you can update the user details, reset the credentials, or access the user’s devices. Here is an explanation of each section on the page:
- Basic details section – In this section you can update the user’s name. If needed, you can also update the user’s email. When any field is changed, the update bar will appear allowing you to save the form.
- Password options – This section allows you to reset the user password, which will send an e-mail to the user with a link to reset their password. Or, you can unset the user password, which prevents the user from logging in via password login.
- Permissions – The options here let you promote (or demote) the user to/from a super user. Note that there must be at least one super user on each appliance, and attempting to demote the last super user will result in an error.
- Fine-grained permissions – When a user is not a super user, this section will appear where you can assign fine-grained permissions to regular users. See the permissions section above for more information on what these permissions mean.
- Devices – The user’s devices on all endpoints are listed here. This section follows the same format as the devices section.